Gaussian Splatting in Blender
This guide shows how to export a Gaussian Splatting scene from Splatware, import it into Blender, and render it using the 3DGS Render addon by KIRI Engine.
You will download your scene as a .ply file from the /create page, install Blender 5.0 and the 3DGS Render addon, then switch from point-cloud preview to full Gaussian splats in Blender.
Requirements
1. Exporting a PLY from Splatware
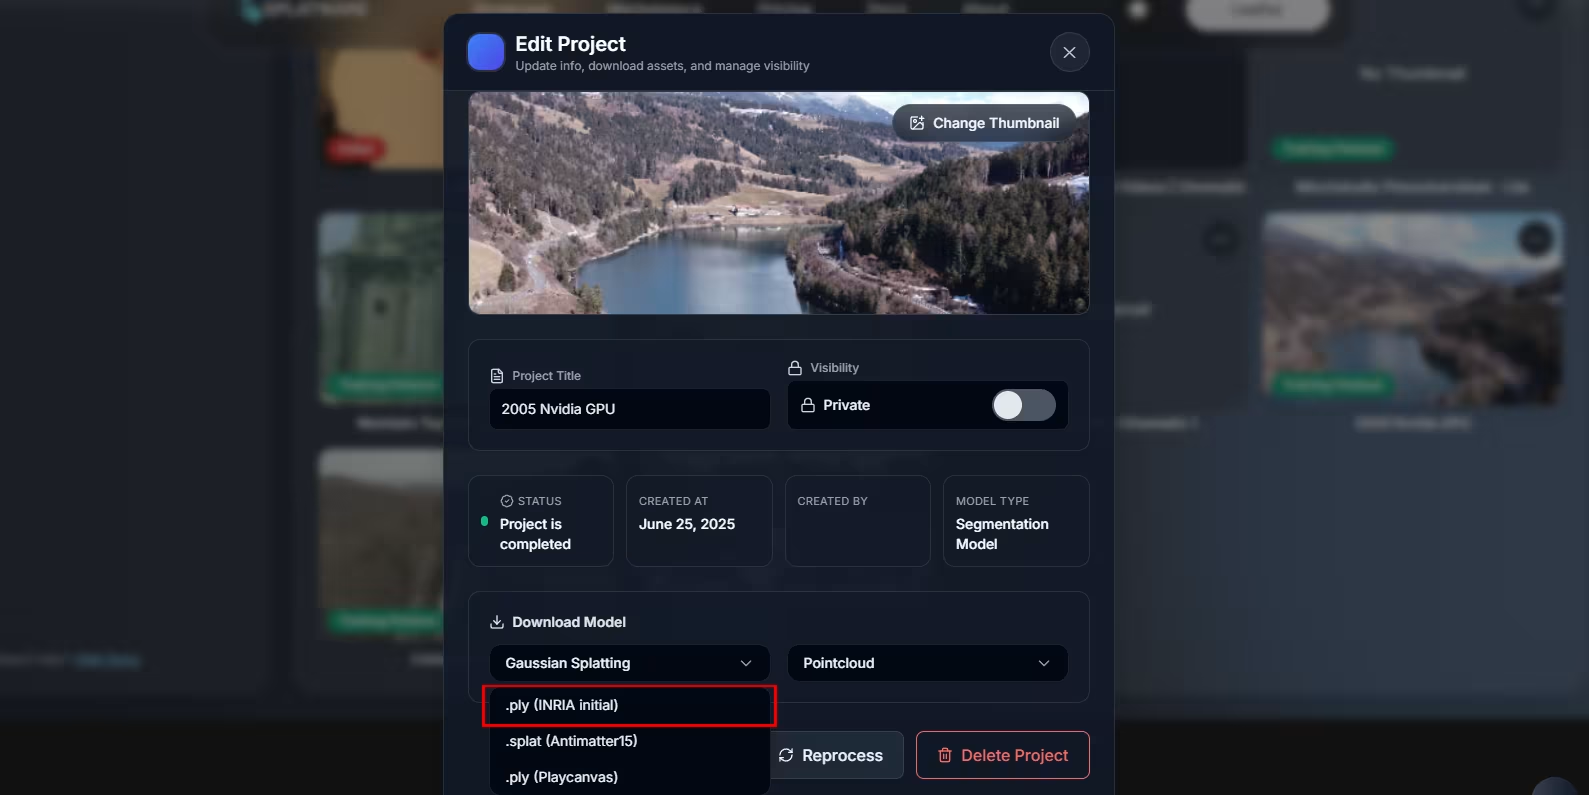
In your Splatware project page (/create), open a finished model and export it as PLY. This will generate a .ply file you can store locally.
2. Blender 5.0
You’ll need Blender 5.0 or newer. Blender is a free and open-source 3D suite.
- Platform: Windows / macOS / Linux
- Recommended: GPU with recent drivers for real-time rendering

3. 3DGS Render Addon by KIRI Engine
The 3DGS Render by KIRI Engine addon adds a full Gaussian Splatting workflow to Blender, including edit and real-time render modes.
| Addon name | 3DGS Render by KIRI Engine (v4.1.0) |
| Main features | Import 3DGS .ply, edit as mesh, real-time Gaussian rendering, modifiers, colour tools, mesh → 3DGS conversion. |
| License | Apache 2.0 – free to use, modify and redistribute under the terms of the license. |
The addon and documentation are provided by KIRI Engine. Please review their official license and docs for full legal details and the latest usage instructions.
Installing the 3DGS Render Addon
- Download the addon
.zipfile from KIRI Engine to your computer. - Open Blender 5.0.
- Drag and drop the addon
.zipinto the 3D Viewport, then confirm the install dialog. - Blender will install the addon and enable it. If needed, you can enable it manually under
Edit → Preferences → Add-ons. - Press N in the 3D Viewport to open the right-hand side bar and look for the 3DGS Render panel.

The addon lives inside the N-panel. From here you can switch between Edit, Render, and Mesh → 3DGS workflows.
Importing Your Gaussian Splat PLY
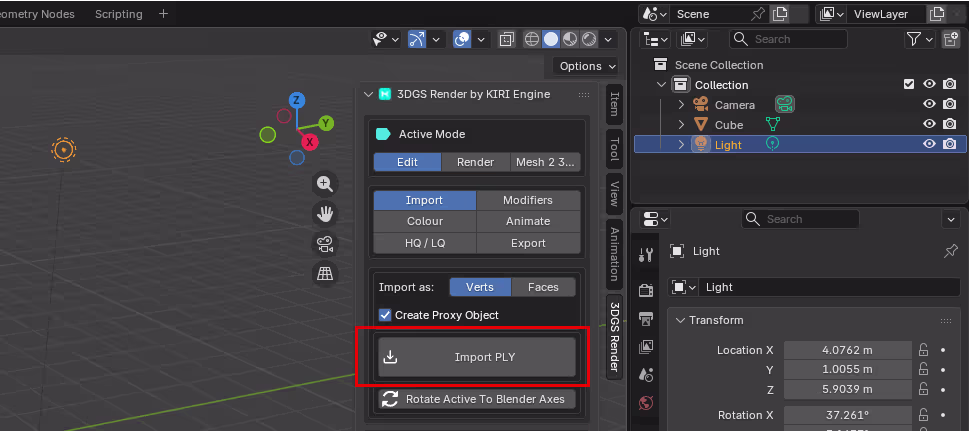
- In Blender, open the N-panel and switch to 3DGS Render.
- In the Active Mode dropdown, choose Edit.
- Go to the Import submenu and click Import PLY.
- Select the
.plyfile you exported from Splatware and confirm. - After a short import, your scan will appear in the scene (often initially as a dense point cloud).
For large scans, import may take a while. Keep Blender responsive by avoiding other heavy operations during the import.
Switching from Points to Gaussian Rendering
By default, imported scans are often displayed as vertices or basic faces for performance. To see them as true Gaussian splats:
- With your 3DGS object selected, open the 3DGS Render panel.
- In Active Mode, switch to Render.
- In the Render sub-menus, enable real-time rendering for the active object (e.g. via Update Scene or the mode’s render toggles).
- If the scan appears only as points, look for the mode that switches from point/mesh view to full Gaussian splats in the active Render settings.
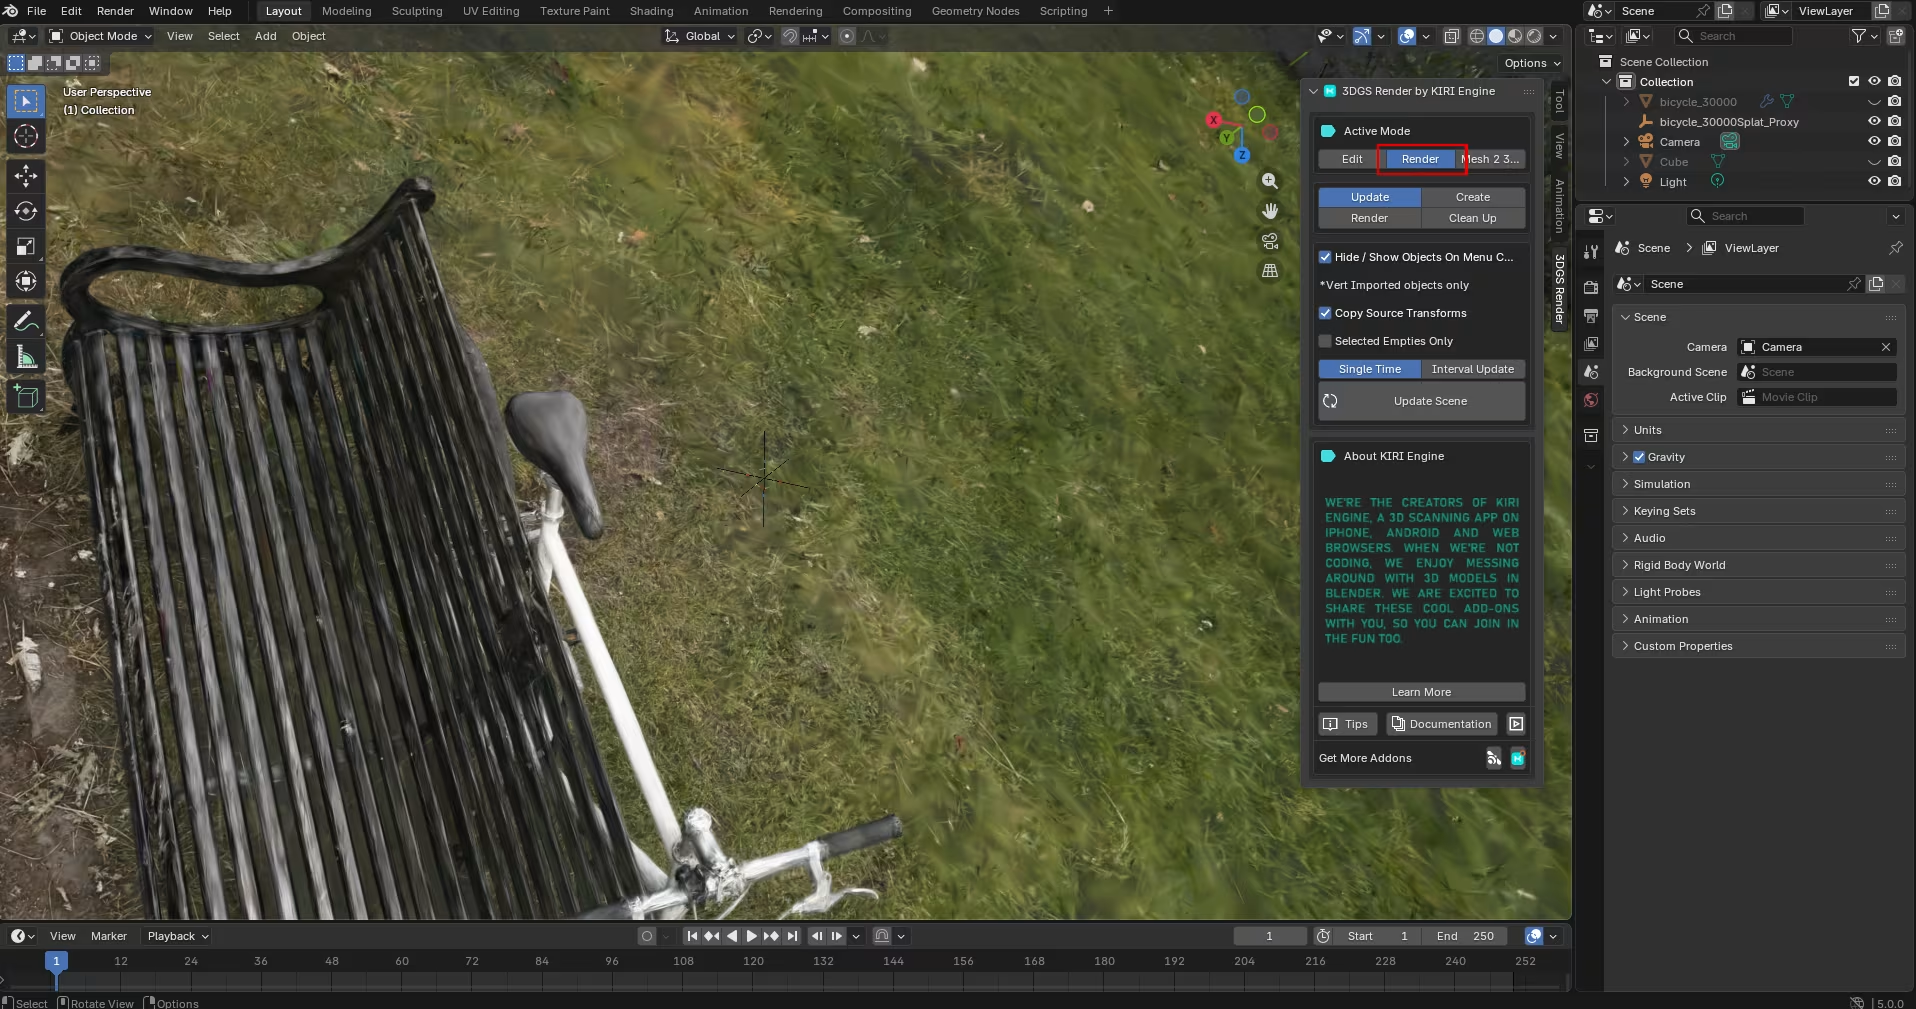
Once in Render mode, you can orbit around the scene and preview the Gaussian splats in real time. For final output, use Blender’s render settings or the addon’s render sub-panel to output still frames or animations.
3DGS Render Addon Overview
The addon separates editing and rendering into distinct modes. This keeps heavy Gaussian data manageable while still giving you high quality output.
| Mode | Use Case | Highlights |
|---|---|---|
| Edit | Cleaning, cropping, decimating and colour-editing scans. | Works as mesh / points; supports modifiers like camera cull, crop boxes, size/colour filters and basic animation. |
| Render | Real-time and offline Gaussian rendering. | High-quality splat rendering, depth passes, combining with native Blender renders, scene update controls. |
| Mesh → 3DGS | Convert .obj meshes to 3DGS .ply. | Requires triangulated meshes with textures and matching .mtl; outputs new 3DGS .ply files. |
The addon also includes extensive controls for colour grading, attribute tweaking, animation effects and exporting modified 3DGS files back out as .ply.
Tips, Limitations & Further Resources
Practical Tips
- Use point-cloud or low-quality previews while placing cameras and blocking out the scene; switch to full Gaussians only when needed.
- For heavy scans, enable camera culling in Edit mode to remove splats outside the view and improve viewport performance.
- Only import 3DGS
.plyfiles generated by compatible tools (such as Splatware export or KIRI 3DGS tools); generic point clouds may not work. - When planning to re-export edited 3DGS files, follow the addon’s export tools instead of applying transforms with Blender’s standard
Apply Scale/Rotation, to keep 3DGS attributes valid.
With this setup, you can move seamlessly from Splatware training and viewing into Blender-based editing, compositing, and cinematic rendering of your Gaussian Splatting scenes.